2014年12月31日水曜日

Introduction of "iAutoPortrait" [ Page 60 ]

The canvas view will be scrolled to the top left corner of the screen if users flick the screen towards the top left corner of the screen.
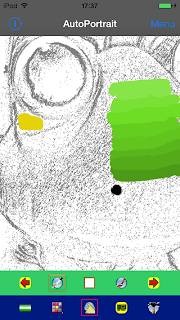
After that, users paint the face of a stuffed frog in yellow with the brush.
In addition, if the syringe icon that will appear after the leftmost arrow icon in the toolbar having the arrow icon on both the left and the right was tapped twice is tapped, the screen will change to the following image.


After this, users can absorb the color of the paint on the screen by using the syringe.
A color in the color palette will change to green by tapping on the green area in the face of a stuffed frog in order to do so.

Back Next

© 2014 Mas Software Studio All rights reserved.
Introduction of "iAutoPortrait" [ Page 30 ]

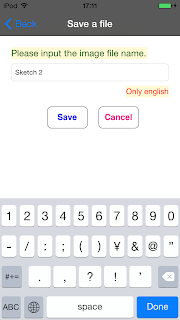
The screen will change to the following image.


A string of the file name will be displayed in the topmost text field if a character on the screen keyboard is tapped.

Back Next

© 2014 Mas Software Studio All rights reserved.
Introduction of "iAutoPortrait" [ Page 27 ]

Please tap the pencil icon in the toolbar having the arrow icon on both the left and the right after scrolling the canvas view to the left by flicking the screen to the left just a little.
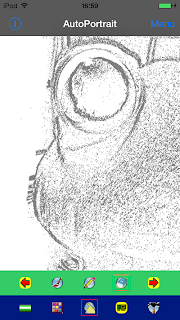
Next because users cannot see the contour of the nose of a stuffed frog well, the screen will change to the following image if draw a picture with a pencil after adjusting the thickness of that by using the bottommost slider.


You'll be able to confirm that the contour of the nose in a picture is finished if you look at this.

Back Next

© 2014 Mas Software Studio All rights reserved.

Introduction of "iAutoPortrait" [ Page 23 ]

If lightly keep touching the left edge green icon in the bottommost toolbar for a short while, the view which has the two switchs possible to show or hide the navigation bar at the top of the screen and the two toolbars will appear.
The screen will change to the following image if the button of "Back" is tapped after tapping the switch for hiding the navigation bar and the switch for hiding the toolbars.


The area that has not been erased with an eraser yet will appear if users look at the bottommost area in this image.
If the navigation bar has been displayed, users will be able to confirm that the hidden area by this exists.
Let's erase the unwanted portions of this area in the area with an eraser.
The screen will change to the following image if users erase this portions in the area with an eraser.


Back Next

© 2014 Mas Software Studio All rights reserved.

Introduction of "iAutoPortrait" [ Page 22 ]

The screen will change to the following image after the screen is tapped with three fingers.
Two toolbars will be shown.


Back Next

© 2014 Mas Software Studio All rights reserved.
Introduction of "iAutoPortrait" [ Page 20 ]

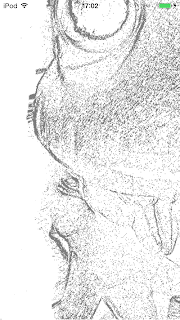
The screen will change to the following image if users rub the bottom left area of the canvas with an eraser.


Back Next

© 2014 Mas Software Studio All rights reserved.
2014年12月30日火曜日

Introduction of "iAutoPortrait" [ Page 10 ]

The screen will change to the following image if the button of "Save" is tapped.


Back Next

© 2015 Mas Software Studio All rights reserved.
Home of iAutoPortrait

Top page Contents Q & A Support

Home of "iAutoPortrait"

Version information of "iAutoPortrait"

  1. Version 1.3 (Now on sale)

  2. "iAutoPortrait ( Ver1.3 )" is now on sale at App Store.

  3. Version 1.2 (The old version)


  4. Version 1.1 (The old version)


  5. Version 1.0 (The first version)


Introduction of "iAutoPortrait"

Introduction of "iAutoPortrait"


© 2016 Mas Software Studio All rights reserved.

2014年11月26日水曜日

Q and A for iAutoPortrait

Top page Home Contents Support

Q & A

  1. Portrait photography techniques in this app


  2. You should shoot at a place bright as possible when you take a picture.
    You should take a picture so that the face color is as bright as possible.
    You should take a picture so that the shadow does not appear on the surface of the face.
    You will rarely need to modify the outline using a pencil tool and an eraser tool later if you can take a picture well in this way.
    A portrait will be completed only to paint with a brush along contour lines.

  3. I don't understand the procedure of drawing a picture.


    • Please tap the upper left button of "i ".
    • You'll be able to understand the content of this app if you tap the item of "Procedure" and you see them.
    • You usually draw a portrait according to the numerical order from [1] to [5].

  4. Usage of the upper toolbar


  5. The image button of an arrow on either side in the upper tool bar is used when the other three buttons are exchanged.

  6. Brush and pencil


    1. What is a controller?


    2. After the brush or the pencil has been choosed, the slider or the button or the label will be drawn automatically.
      Each of these is called a controller.

    3. How to redraw the controllers


    4. If you want to redraw the controllers that is displayed on the bottom, you can redraw if you double-tap the screen anywhere you like.
      In addition, when the icon of the brush tool is tapped again after the button of "End" was tapped, you can redraw the controllers of the brush tool, or when the icon of the pencil tool is tapped again after the button of "End" was tapped, you can redraw the controllers of the pencil tool.

    5. I want to erase the obstructive controllers?


    6. It's possible to erase the obstructive controllers if the button of "End" is tapped.
      While if you drag around the controllers using 2 fingers, you can also move only the controllers in a lump.

  7. Eraser


    • Redisplay of a small window


    • After you have determined the shape or size of the eraser, please tap the image button of the eraser on the toolbar when you want to display a small window to change the shape or size of it again.
      In addition, as the text of the red character is written on the upper pink background of the window, please read this first.
      If you tap on the pink background, the background and the text will disappear.

  8. Syringe


  9. The color of a touched pixel on the screen is gotten when the screen was touched after the syringe icon on the toolbar was tapped.

  10. Screen


    • Isn't part of image missing?


    • No, it isn't.
      You can use a larger image than a physical screen in this app.

  11. I don't understand the work procedure after having automatically extracted the contour.


  12. After the app was started, a menu which has three buttons will be displayed.
    You can tap a button among the buttons of the camera or photo album.
    When the button is tapped, the image is displayed for a short time.
    After that, the image turns into that of only the contour lines, and then the contents of the screen will change as follows after waiting a little.

    Guide


    First, please read the above explanatory text.
    It's expected that users understand this later work procedure from this explanatory text.

  13. The limit of the image size which can be read


  14. If you are satisfied with the quality of image you want to read, no matter how large or small it is, you'll be able to load the image.
    When the larger image than canvas is loaded, the image is reduced to the size of canvas.
    The canvas of this app is designed to become larger than a physical screen.

  15. How to use the finger gesture


    1. Outline


      1. Tap


      2. Tap means that the screen is touched lightly.

      3. Double-tap


      4. Double-tap means that the screen is tapped twice in a row.

      5. Flick


      6. "Flick" means that a finger jumps so that a fingertip lightly grazes the screen toward some of top and bottom and left and right.

      7. Drag & drop


      8. "Drag and drop" means that users release in one or more fingers after moving their fingers on the screen.

      9. A limit on the number of fingers


      10. The number of fingers that are allowed in this app is only one and three.

    2. The canvas of this app


    3. The fingering usable by this app is only the tap, the double tap, the flick, and the drag & drop.
      It's possible to use only one finger about the flick among these.
      It's possible to use only one or two fingers about the other.

    4. When users can flick


    5. If there is an image protruding from the screen, this app is designed to be able to flick in principle.
      There is a color palette in the representative things except the canvas of this app.
      While using the color palette, you can flick up and down if you lay down your device.
      If you flick on the screen, you'll be able to see the part which you couldn't see.

    6. Detail


      1. One finger


        1. Syringe


        2. The color of a touched pixel on the screen is gotten when the screen was touched after the syringe icon on the toolbar was tapped.

        3. How to stop the scroll


        4. The scroll is stopped if the screen is tapped with a finger after it was flicked.

        5. Drag & drop


          1. Gloss shadow brush


          2. You can add gloss or shadow to your portrait or someone's portrait with the brush in dragging your finger on the screen if you have already choosed the brush icon on the toolbar.

          3. Pencil


          4. You can draw as if you drew with a pencil by dragging your finger on the screen if you have already choosed the pencil icon on the toolbar.

          5. Eraser


          6. You can erase the picture as if erased with the eraser by dragging your finger on the screen if you have already choosed the eraser icon on the toolbar.

        6. Double-tap


        7. When the eraser or the pencil or the Gloss Shadow Brush has been selected and the controllers used for them has been hidden, you will be able to redraw the hidden controllers again if you will perform double-tap.

      2. Three fingers


      3. You can tap on the screen at the same time with three fingers if you want to display two hidden toolbars.

  16. Please teach how to enlarge or shrink the image size


  17. Please clear all numerals that represent the width of the image at first if an image and a software keyboard has been displayed on the screen.
    After that, please input a numeric value of the width of the image by tapping a numeral button.
    Next, tap on the text field for inputting a numeric value of the height of the image.
    And, please work the same as when you inputted a numeric value of the width of the image.
    Next, the image will be resized to any size and be redrawn if the button of "Adjust" has been tapped.
    Or, users can cancel only once if the button of "Undo" has been tapped.
    Users can change the image size once again after they have canceled.
    You can go back at once to a virtual canvas for painting after you have tapped the button of "Cancel" if you will cancel your past work.
    You can save the resized image to your photo album by tapping the button to save an image to it if you have resized the image.

  18. Please teach how to upload portraits


  19. Please use the storage service such as iCloud or Dropbox or Google Drive after you saved a portrait to the photos album.

  20. [Ver1.3] The new feature


    1. Can I make two or more colors?


    2. You can make two or more colors and save them to the file if you will use Version 1.3 of this app.
      In addition, you can change one of the saved plurality of colors.
      Therefore you can change the brush color.

    3. Please teach how to make a plurality of colors


    4. You can make a plurality of colors if will go through the following procedure in numerical order.

      1. Make a color

      You can make a color after tapping the icon of color palette or brush.

      2. Edit colors

      Tap the hammer icon in the lower right please.
      Then tap the button of "Edit colors" on the screen please.

      3. Get the color

      If you tap the button of "Get the color", you can acquire the color that was already made.

      4. Input the color name

      Please input that color name.
      For example, you should choose a name associated with that color.

      5. Save the color

      If you will tap the button of "Save" at last, you can reuse that color because the color is saved.

      6. Repeat steps 1-5

      Please repeat steps 1-5, if you want to make a plurality of colors.

    5. Can I choose one of already made colors?


    6. Yes.
      Please tap the button of "Edit colors" after tapping the hammer icon in the lower right.
      You will see the color names on the screen if there are one or more colors.
      Please tap the favorite color name.
      Color will be changed by this operation only.
      You will see the changed color if you will tap the color palette icon.

    7. Can I restore the removed colors?


    8. Yes.
      Because this app restore the removed colors from a file peculiar to that, that will restore all those colors during start.

© 2016 Mas Software Studio All rights reserved.